
Introduction
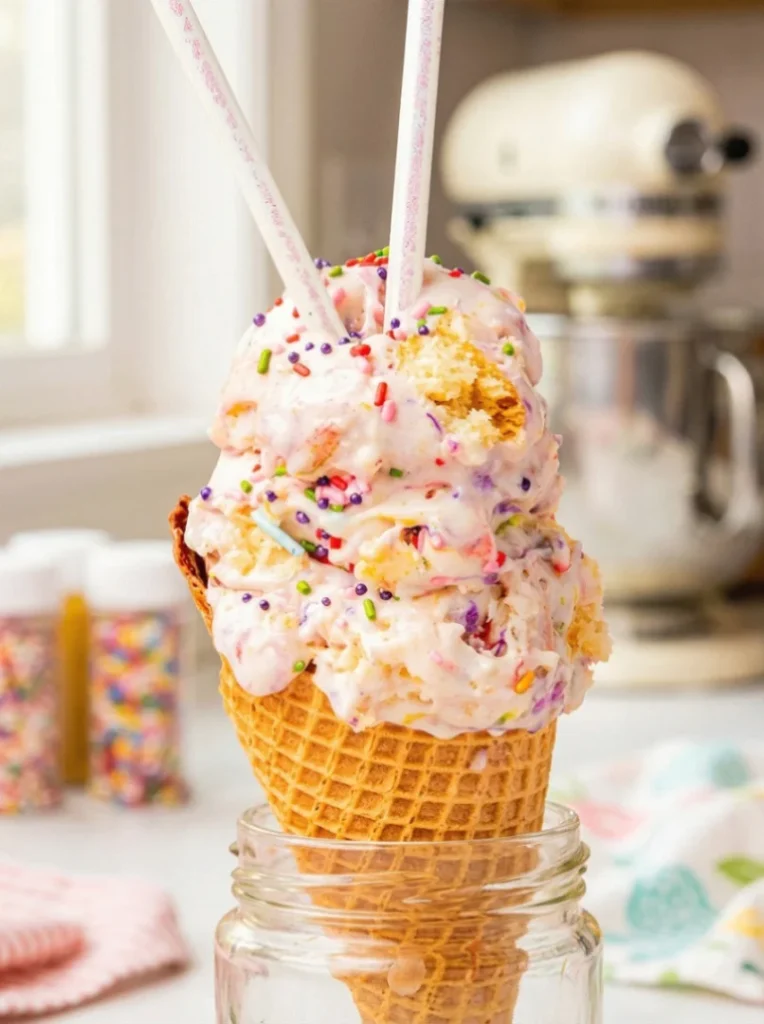
Imagine combining the nostalgia of a birthday celebration with the creamy delight of homemade ice cream. Birthday cake ice cream is the perfect fusion of these two joyous elements, creating a treat that is both delightful and memorable. This recipe captures the essence of a birthday cake flavor ice cream by incorporating funfetti-like sprinkles and soft cake pieces into a luscious vanilla ice cream base. Whether you’re preparing for a kids’ party dessert idea or simply looking to indulge your sweet tooth, this sprinkle ice cream is sure to bring a smile to your face. With this recipe, you’ll learn how to make ice cream at home, even if you don’t own an ice cream maker. The no-churn ice cream method ensures that anyone can enjoy this unique ice cream flavor without hassle. Let’s dive into this sweet and creamy dessert and discover what makes it so special!
Ingredients
- Dry Ingredients:
- 1 cup of cake mix (vanilla or funfetti for added color)
- 2/3 cup rainbow sprinkles
- Wet Ingredients:
- 2 cups heavy whipping cream
- 1 can (14 ounces) sweetened condensed milk
- 2 teaspoons vanilla extract
- Toppings:
- Additional sprinkles for garnish
- Optional: small cake pieces from a leftover birthday cake
Note: When selecting your cake mix, aim for high-quality brands to ensure a better texture and flavor. You can substitute homemade cake pieces for store-bought ones if you prefer a more personalized touch.
Steps / Instructions
- Prepare the Vanilla Ice Cream Base: In a large mixing bowl, whip the heavy cream until stiff peaks form. This should take about 3-4 minutes using an electric mixer on medium-high speed.
- Combine Wet and Dry Ingredients: Gently fold in the sweetened condensed milk and vanilla extract into the whipped cream using a spatula. Be careful not to deflate the mixture.
- Add the Cake Mix: Gradually sift and fold in the cake mix. Ensure there are no lumps and that the mix is fully incorporated into the creamy base.
- Incorporate the Sprinkles: Stir in the rainbow sprinkles, distributing them evenly throughout the mixture. This will add a festive touch to your ice cream.
- Optional Cake Pieces: If desired, gently fold in small cake pieces to enhance the ice cream and create an ice cream cake combination.
- Freeze the Mixture: Transfer the creamy mixture into a loaf pan or ice cream container, smoothing the top with a spatula. Cover with plastic wrap to prevent ice crystals from forming.
- Final Freeze: Place the container in the freezer for at least 6 hours or until the ice cream is firm. For best results, allow it to freeze overnight.
- Serve and Enjoy: Once the ice cream has set, scoop it into bowls or cones. Garnish with extra sprinkles for a true birthday cake finish.
Tip: For those with an ice cream maker, simply combine all ingredients except the sprinkles and follow your machine’s instructions. Add sprinkles during the last 5 minutes of churning. Check out our related guide for more tips.
Conclusion
Creating birthday cake ice cream at home brings a delightful and festive touch to any occasion, particularly for kids’ party dessert ideas. With its creamy ice cream texture, vibrant rainbow sprinkle dessert appearance, and the nostalgic taste of cake, this sweet treat is bound to be a favorite. We encourage you to explore different cake flavors and sprinkle combinations to create unique ice cream flavors that suit your taste. Whether served at a birthday celebration or as a special treat, this festive ice cream treat will surely leave lasting smiles. If you enjoyed this recipe, let us know how it turned out! For more dessert inspiration, consider pairing it with classic dishes like Lemon Blueberry Muffins or indulge in a Cranberry Orange Breakfast Cake for a complete dessert experience.

Birthday Cake Ice Cream
Ingredients
- •2 cups of heavy cream
- •1 cup of whole milk
- •3/4 cup of granulated sugar
- •2 teaspoons of vanilla extract
- •1/8 teaspoon of salt
- •1 cup of prepared and crumbled birthday cake (store-bought or homemade)
- •1/2 cup of rainbow sprinkles
Instructions
Recipe Reviews
Leave a Reply
Your email address will not be published. Required fields are marked *