

Introduction
If you’re a chocolate lover seeking a quick dessert fix, these 3-ingredient brownie truffles are the solution to your cravings. Imagine rich, bite-sized chocolate dessert bites that melt in your mouth, leaving you in chocolate bliss. Perfect for a quick indulgence or an elegant treat for gatherings, these truffles require no baking, making them the ideal dessert for those who want maximum flavor with minimal effort. Their simplicity also means they are perfect for involving kids in the kitchen, making it a fun family activity.
Originating from the classic concept of chocolate truffles, these no-bake brownie truffles are a testament to the beauty of simplicity. Their charm lies in the fact that even with just three ingredients, you can create a dessert that feels luxurious. Whether you’re making them for an easy holiday treat or just to satisfy your sweet tooth, these truffles promise to bring joy with every bite. Not only are they delicious, but they also provide a mess-free dessert option that can be prepared ahead of time, giving you more time to enjoy your gatherings.
Ingredients
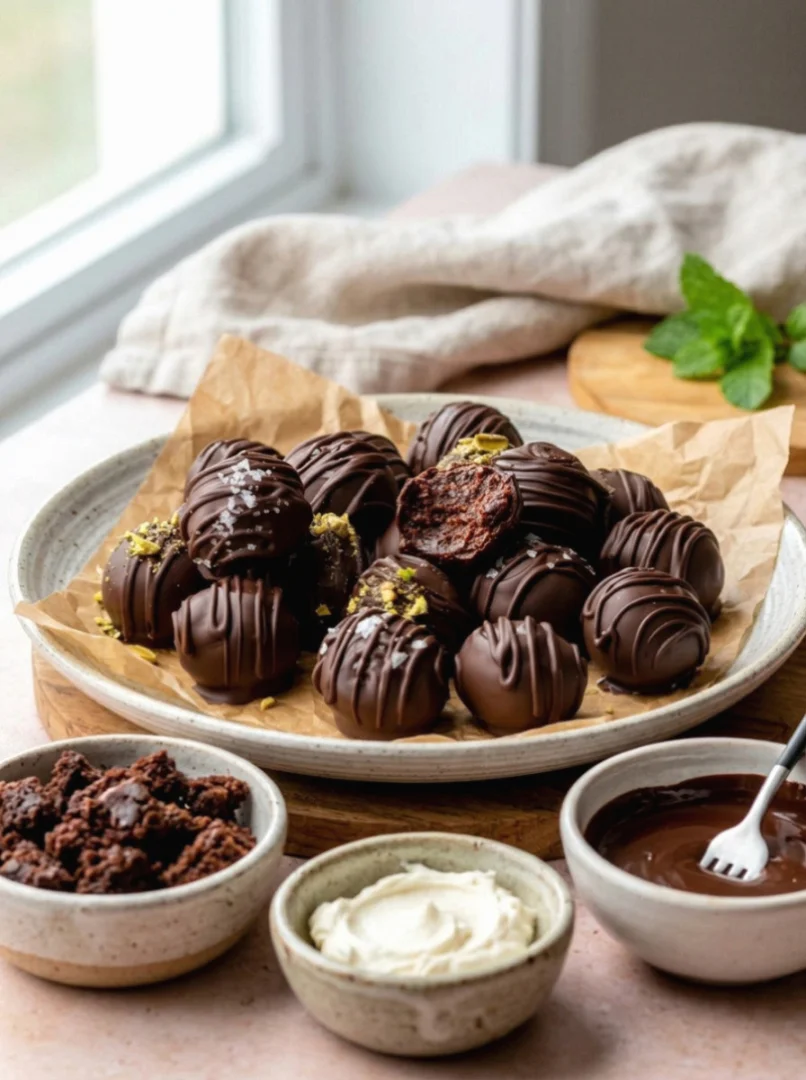
- 1 1/2 cups brownie mix – Opt for a high-quality brownie mix to ensure a rich chocolate flavor. You could also use a homemade mix if preferred. For those seeking a gluten-free option, there are many suitable brownie mixes available on the market.
- 1/2 cup sweetened condensed milk – This ingredient brings a creamy texture and binds the truffles together, adding a touch of sweetness that balances the cocoa powder. Ensure that the milk is fresh for the best results, as it is crucial for the binding process.
- 1/4 cup cocoa powder – For coating, use unsweetened cocoa powder. It provides a classic truffle finish and enhances the chocolatey depth. If preferred, you can substitute with finely chopped nuts for a nutty flavor twist.
Steps / Instructions
- Prepare the truffle mixture: In a medium-sized mixing bowl, combine the brownie mix and sweetened condensed milk. Stir well until the mixture is thick and sticky, resembling a dough. This step might require some elbow grease due to the dense texture, but the resulting creamy consistency is worth the effort. If the mixture seems too sticky, a light dusting of cocoa powder on your hands can help manage the dough better.
- Chill the dough: Cover the bowl with plastic wrap and refrigerate for about 30 minutes. Chilling allows the mixture to firm up, making it easier to shape into truffles. Remember, patience during this step ensures that the truffles maintain their shape and are easier to handle.
- Form the truffles: Once the dough has chilled, remove it from the refrigerator. Using a small scoop or a spoon, measure out even portions of the mixture. Roll each portion between your palms to form smooth, round balls. Aim for uniformity to ensure even coating later. A tip is to slightly dampen your hands to prevent sticking during rolling.
- Coat in cocoa powder: Pour the cocoa powder into a shallow dish. Roll each ball in the cocoa powder until uniformly coated. This step not only adds a lovely finish but also serves to balance the sweetness with a hint of bitterness from the cocoa. Try using a fork to gently roll the truffles for a more even and less messy coating process.
- Final chilling: Place the coated truffles on a tray lined with parchment paper. Return them to the refrigerator for an additional 10-15 minutes to set fully. This final chill helps the truffles hold their shape when served. You can also freeze them for longer storage; just thaw a few minutes before serving to enjoy at their best.
Conclusion
These 3-ingredient brownie truffles are a testament to how simplicity in the kitchen can produce stunning results. Whether you’re entertaining guests or simply treating yourself, their decadent flavor and easy preparation make them a go-to quick dessert idea. As you take a bite, let the rich chocolate center and smooth cocoa coating transport you to a realm of pure indulgence. Check out our related guide for more tips. Their small size also makes them an ideal, guilt-free indulgence, perfect for portion control.
We invite you to explore more easy dessert recipes like this one. Your feedback and comments are always cherished, so don’t hesitate to share your experience with us. For more delightful no-bake treats, check out our No-Bake Cherry Delight or Raspberry Orange Juice Popsicles. These recipes embody the same simplicity and deliciousness that allow you to impress without stress.
3-Ingredient Brownie Truffles
Ingredients
- •1 box (about 18.3 ounces) of brownie mix
- •8 ounces of cream cheese, softened
- •1 cup of semi-sweet chocolate chips
Instructions
Recipe Reviews
Leave a Reply
Your email address will not be published. Required fields are marked *